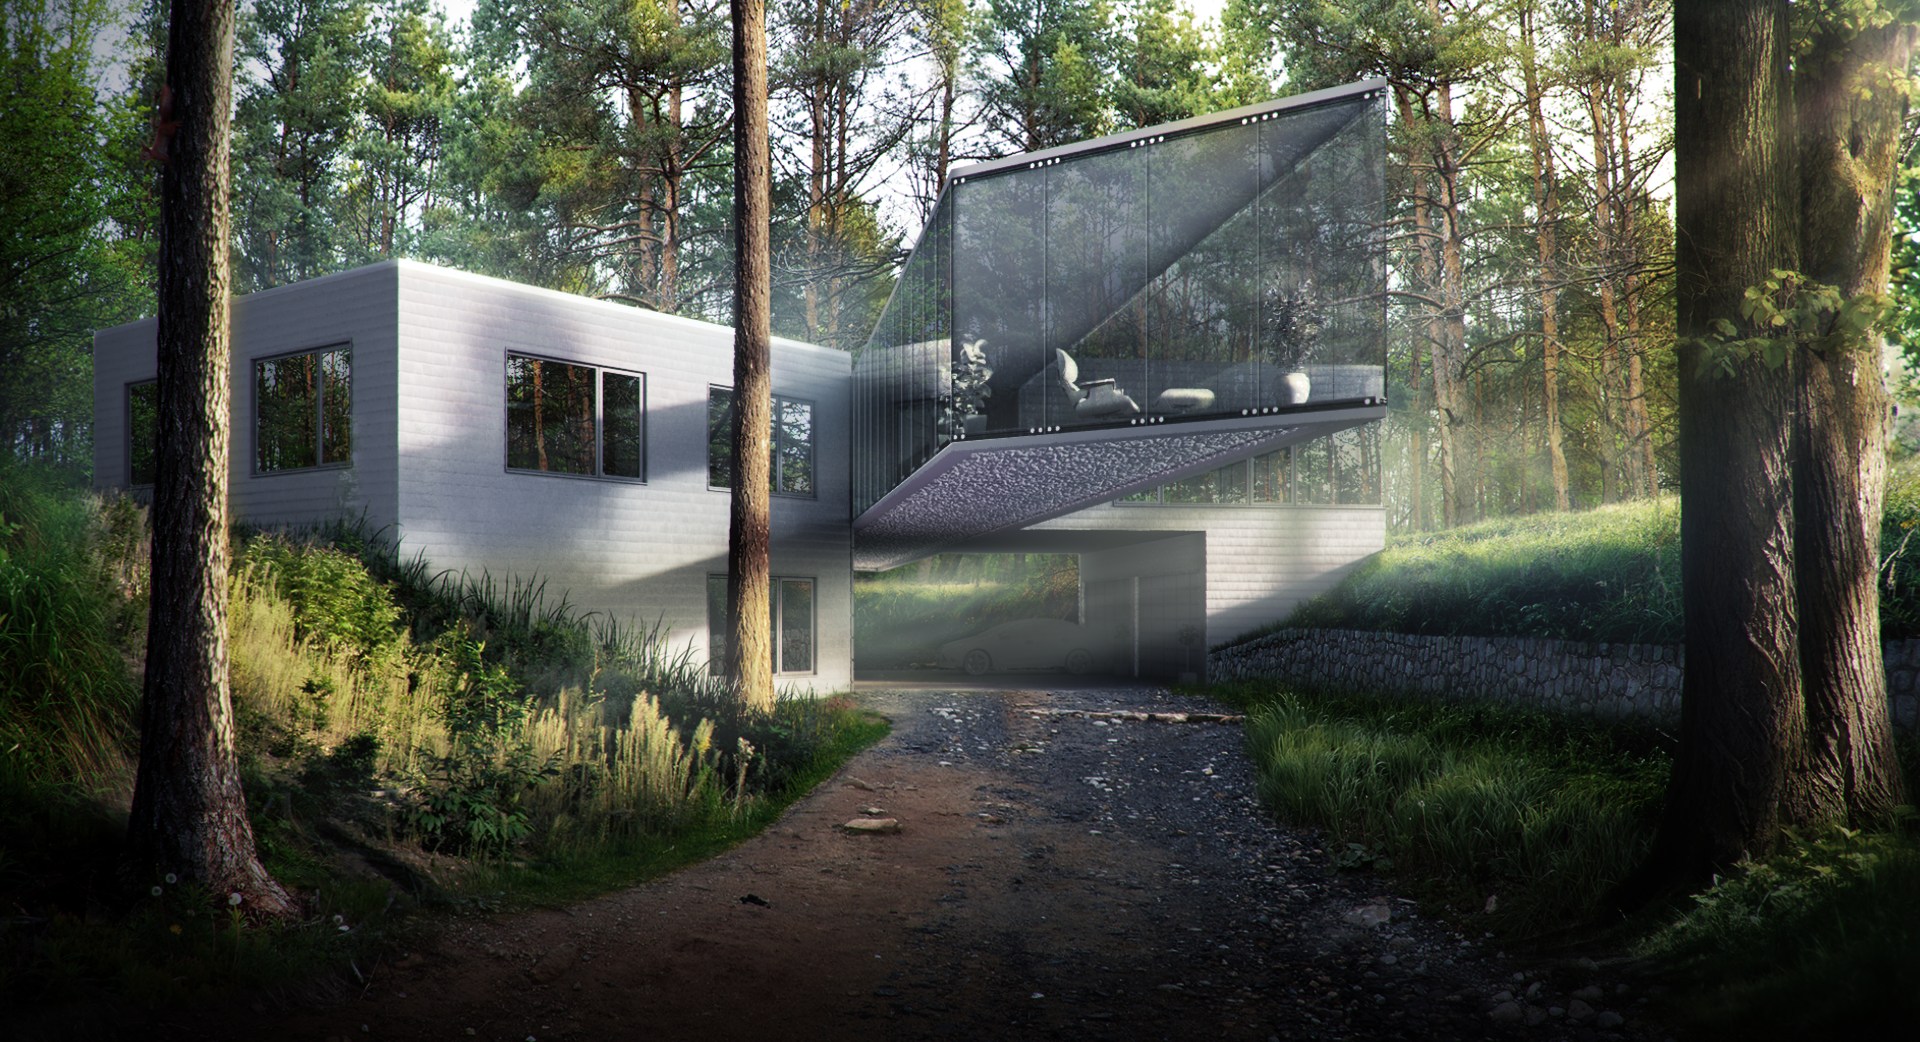
Description
Forest house tutorial was created as an attempt to cover the topic of advanced materials and extensive forest environment in Photoshop, therefore is recommended for advanced users - users familiar with basics of Rhino, V-Ray and also Photoshop. Also others are welcome to read through and follow, but make sure to read other Novice and Explorer tutorials first ;)
Long story short - welcome to this tutorial covering modeling (Novice section), materials (Explorer section) and postproduction (Ninja section) to handle all steps of creating and finishing the project.
This first part of the tutorial covers modeling in Rhinoceros 5 with usage of VisualARQ plugin. Let's start!
Comments

D-W
Feb 27, 2015
Hi, in this step you could also use merge srf command instead of del and mirror http://docs.mcneel.com/rhino/5/help/en-us/commands/mergesrf.htm
Reply
D-W
Feb 27, 2015
Hi, in this step you could also use merge srf command instead of del and mirror http://docs.mcneel.com/rhino/5/help/en-us/commands/mergesrf.htm


papaya
Feb 28, 2015
Great tutorial. For wooden facade you can also use extract surface and then adjust custom mesh for these surfaces. For setup put everything to zero except for the maximum edge length and check only refine mesh.

Matus
Mar 1, 2015
Yes, there are always several ways to achieve the same result :) Thanks for pointing out!

rekoks
Apr 6, 2015
Hello, I have a question about step 97 - what is the rebuild done for? Why do you need so many UV point? But what intrigues me most - why is degree 3 needed for planar surfaces? Does it affect displacement anyhow? Thanks in advance for your answe
Matus
Apr 6, 2015
Hi Rekoks! I did that because I saw somewhere that if you rebuild NURBS surfaces, you will get proper displacement (flawless disp.), however when I made some tests, it seemed to be the same, so maybe rebuilding is not required.


Itam
Apr 19, 2016
Very interesting approach for the modelling! Make's me want to go back to Rhino!
Sign In to add a comment.