Post production
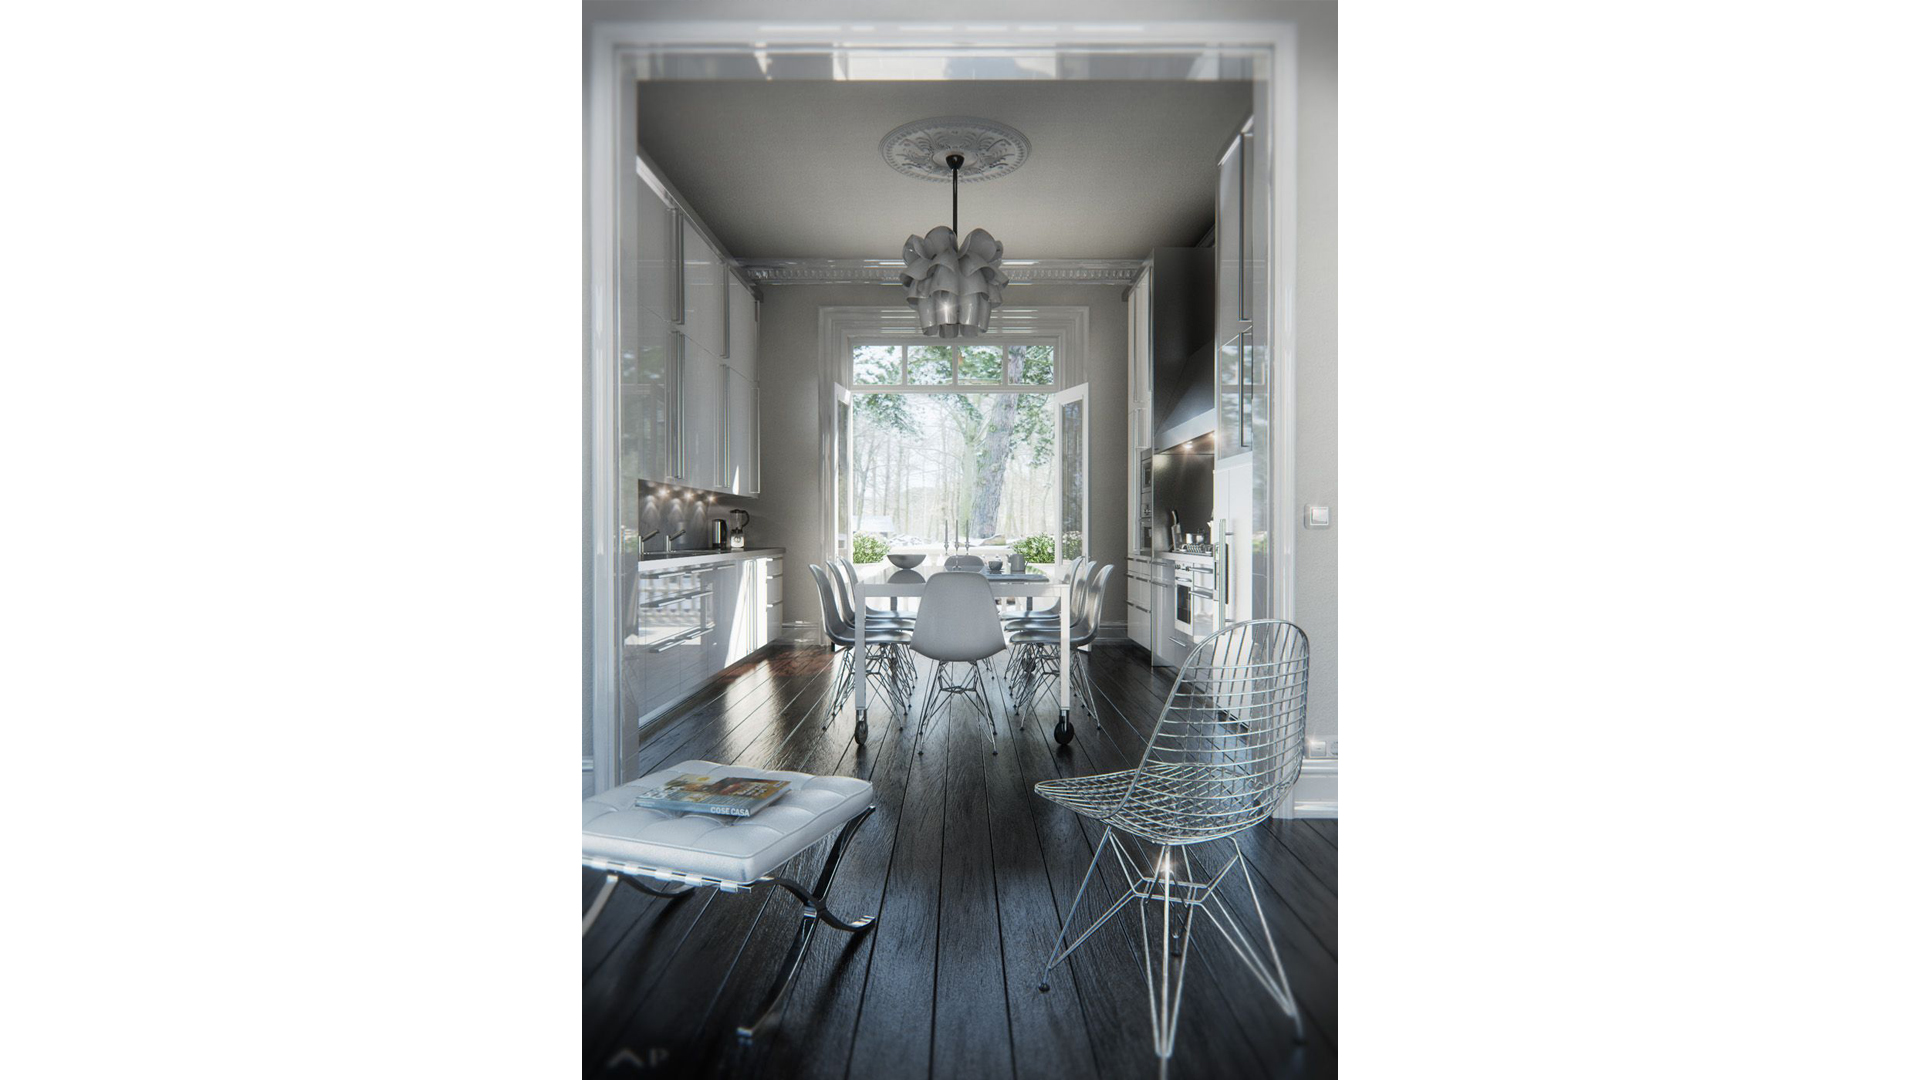
Step 11/14 - Raw render
Actually The RAW render does not differ from the final that much, because the lighting was just fine. I only had to adjust the levels a bit.
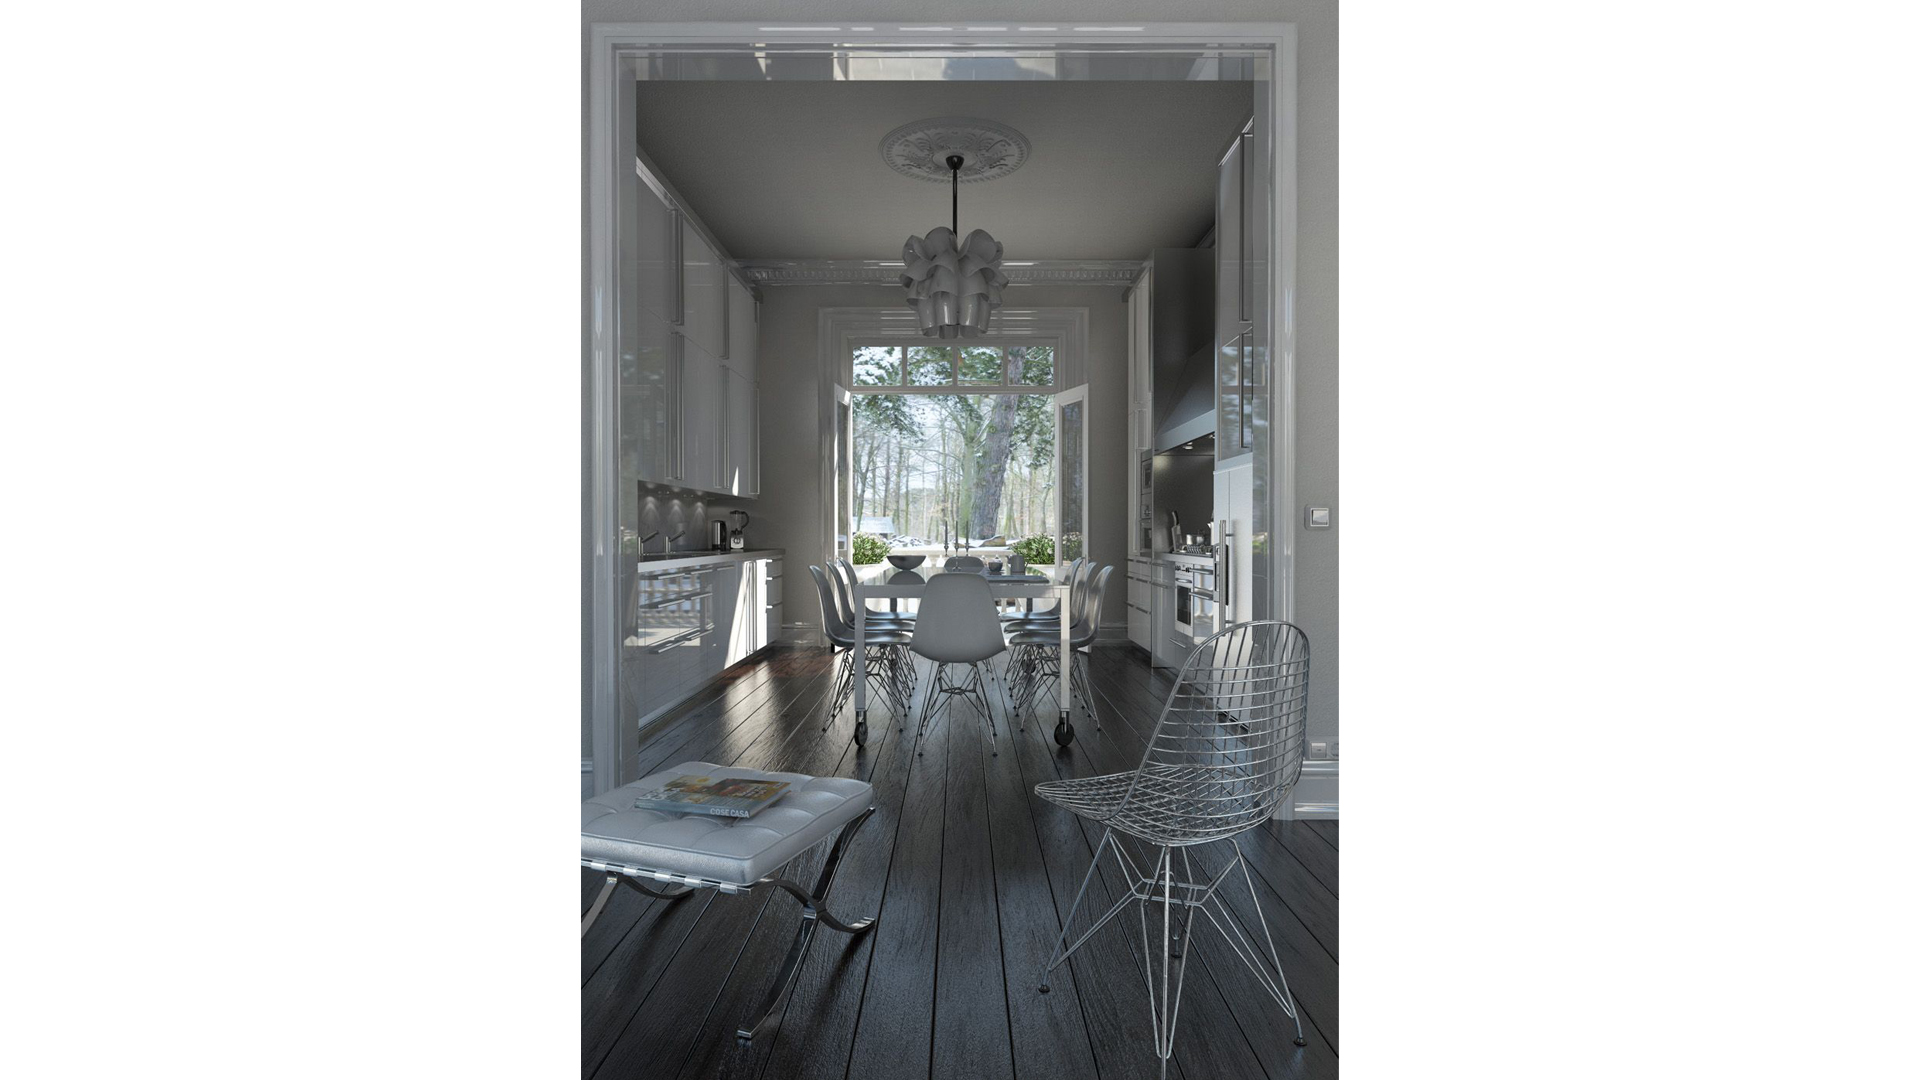
Step 12/14 - Levels and effects
In Photoshop I adjusted levels, corrected a bit the color balance and put some lens flares. I don’t remember actually if I used also Adobe Lightroom in some step. It might be for the white balance, but I’m not sure though.
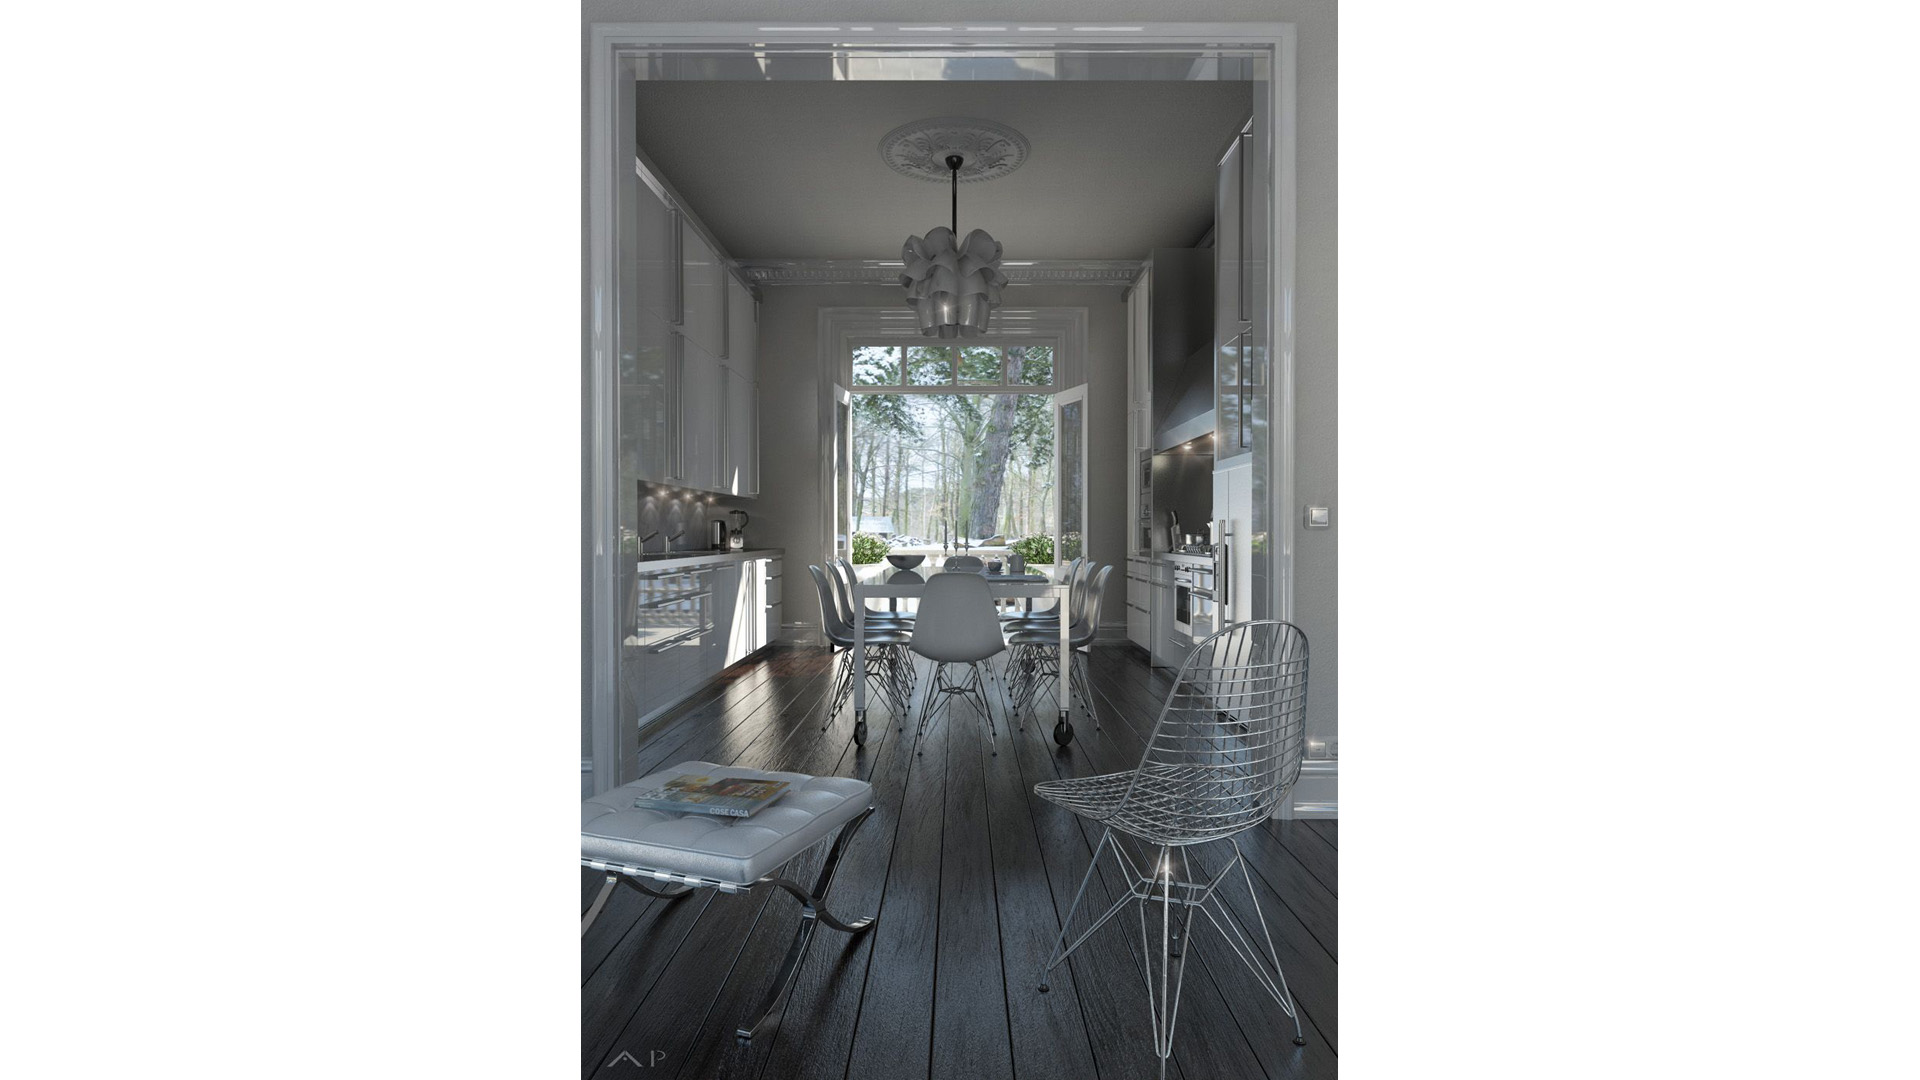
Step 13/14 - Filters, blur and effects
Further step was to bring it inside Magic Bullet looks, wich added some Hard diffusion, Color abberration, and some other filters, like vignette and some edge blurring.
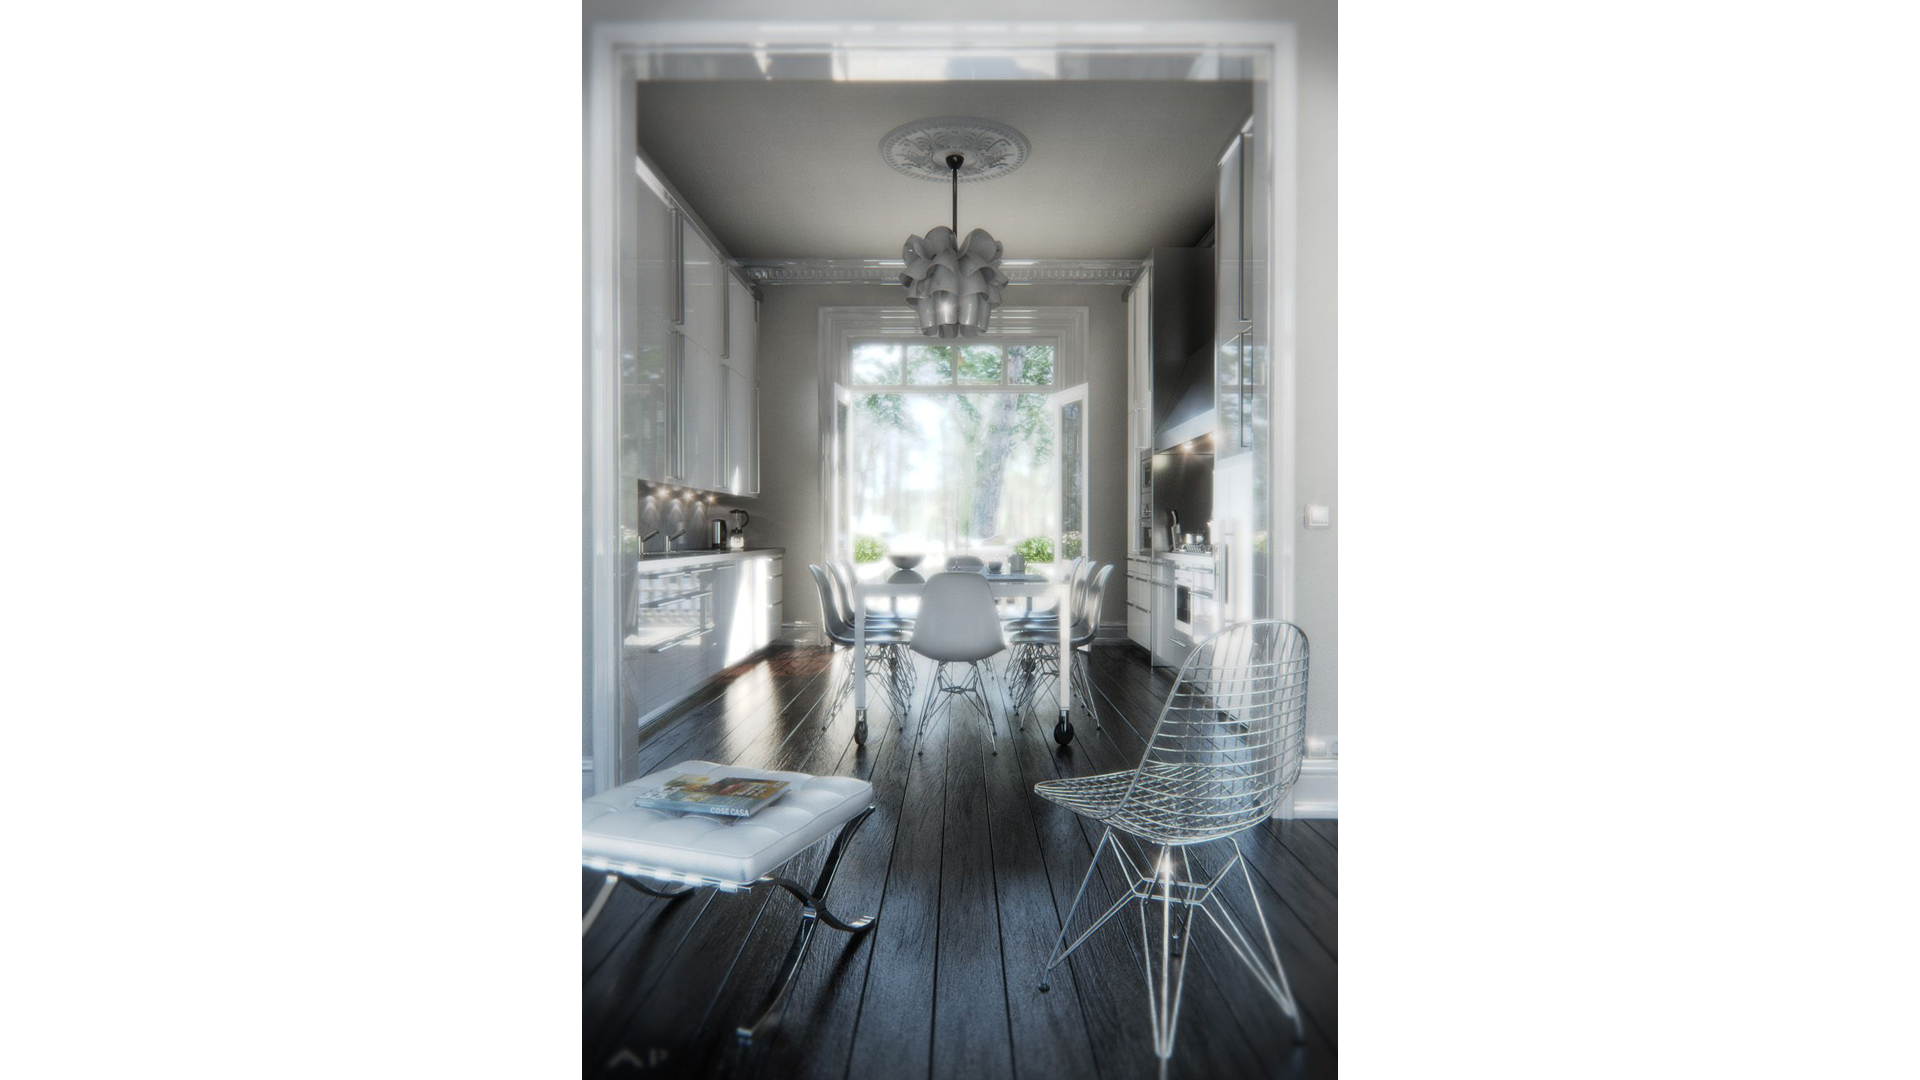
Step 14/14 - Final version
Final version was obtained by bringing back the previous image and mixing it with the second one. I added some sharpening to recover the color abberration blurriness.
I was very Happy to share this making of with all of You. As you’ve seen it was not hard at all to get a beautiful image in the new v-Ray for Rhino. Anyway I must admit it took me a while to have the grasp over complex materials, and I’m still learning. I’m in the process of creating an exterior visualization which I want to be really complex, at least for a Rhino user, who has not all 3dsMax plugins and toys. Said that, I envite You to visit my blog, and share some of your thoughts about anything you want.
Besides that, I want to thank Matus for this opportunity and for his frienship. Hugs my friend.
Thanks for reading.
Fede

Congratulations! You've finished the tutorial. Get yourself a reward!